![]()
I recently moved from Notion to Obsidian and one big problem I’ve had to face was how to sync my desktop instance with my android mobile one without having a paid plan on Obsidian.
After some researches, I discovered how to do it smoothly…
The main tool that I use for my backup/sync is git and specifically, I use a private repo on Github to store my vault.
I don’t have any sensitive information in my vault, so be aware that even tho your vault is inside a private repo, it won’t be encrypted.
Computer
There is an amazing plugin called Obsidian Git which automatically commit and push toward my repo each 10minutes.
Make sure that the Disable push option is deactivated.
It works out of the box if you have already set your credentials on your computer and of course, you always need to initialise your git repo first with
git init
git remote add origin <your repo's address>
Enter fullscreen mode
Exit fullscreen mode
Obsidian Git will automatically pull new changes when you start Obsidian, you can also pull it by yourself through the command line or the hotkey ctrl+p searching for “Obsidian Git: Pull”.
I would suggest to put in your .gitignore :
.obsidian/workspaces.json
.obsidian/workspace
.obsidian/cache
.trash/
.DS_Store
.vault-stats
Enter fullscreen mode
Exit fullscreen mode
You can just commit and push
git add .
git commit -m "First commit"
git push
Enter fullscreen mode
Exit fullscreen mode
Now the Obsidian vault is on Github 🎉
Android
Okay, the vault is online, but how can we sync it on your android mobile phone?
We can install https://termux.com/ to get a Linux shell on your Android, then you can install git and clone the repo.
You can install termux from the Play Store and then execute it, installing and configuring what we need with:
> pkg install git #to install git
> termux-setup-storage #to make storage available
Enter fullscreen mode
Exit fullscreen mode
Now let’s configure the Github credentials.
Github credentials
First of all, you need to generate an ssh key for the Android mobile phone
ssh-keygen -t ed25519 -C "email@provider.com"
Enter fullscreen mode
Exit fullscreen mode
Don’t add a passphrase, just press enter
If you don’t have ssh installed type
pkg install openssh
Enter fullscreen mode
Exit fullscreen mode
Now you need to add the ssh key to the Github’s account, just following these instructions: https://docs.github.com/en/authentication/connecting-to-github-with-ssh/adding-a-new-ssh-key-to-your-github-account
To get the ssh key you can just type on termux cat .ssh/id_ed25519.pub copying the key and pasting it into the key field of Github’s form adding the ssh key to your account.
Once we have followed these steps we can try to clone the repo:
git clone git@github.com:YOUR_USER/YOUR_REPO_NAME.git
Enter fullscreen mode
Exit fullscreen mode
and then let’s move it to the shared folder so you can access it from any Android application:
mv YOUR_REPO_NAME/ storage/shared/
Enter fullscreen mode
Exit fullscreen mode
Now you can just open the directory from your Obsidian application and here we go, we have the vault up to date with the latest changes.
I also suggest putting inside your vault a .nomedia file so you won’t see the image contained in your vault in your gallery.
But how can make this process simpler?
Let’s first create a soft link to the repo to simplify the process:
ln -s storage/shared/YOUR_REPO_NAME YOUR_REPO_NAME
Enter fullscreen mode
Exit fullscreen mode
And then let’s create a pull.sh script that you will run to pull the latest changes from the repo:
cd YOUR_REPO_NAME/
git pull -r
Enter fullscreen mode
Exit fullscreen mode
and the push.sh script:
cd YOUR_REPO_NAME/
git add .
git commit -m "synched with android on $(date)"
git push
Enter fullscreen mode
Exit fullscreen mode
then let’s make them executable:
chmod +x push.sh pull.sh
Enter fullscreen mode
Exit fullscreen mode
From now on, you can push and pull executing those scripts with:
./pull.sh
./push.sh
Enter fullscreen mode
Exit fullscreen mode
Be aware that this solution doesn’t handle possible conflicts which I try to avoid as much as possible resetting my mobile vault considering the desktop one as the most up to date (having regular backups helps me to validate this assumption easily).
Of course, there is surely a window of improvement on this solution but I’m ok right now with this one, it’s easy to open termux, type ./pull.sh and then exit right after that I updated my vault.
The Obsidian Android app is finally live! 🔴
I have been experimenting with the app for the last few days and have discovered some interesting things.
Earlier, I was using Obsidian on my Linux and Windows 10 PC. I used Google Drive to sync the Obsidian Vault between computers.
Now, since the mobile app is live, I decided to sync the vault among my laptop, PC, and Android device.
Google Drive worked fine for syncing between the computers but there’s no efficient way to sync a local Android folder with the Google Drive remote folder.
Yes, there are a few third-party options like Autosync and FolderSync, but I did not want to involve another client which will have access to all my data.
Later, I came across Syncthing and decided to give it a try. I knew about Syncthing from earlier but never thought to use it in this setting.
After trying, it turned out to be exactly what I was looking for.
Obsidian’s mobile app is so cool — the look and feel are almost exactly the same as the desktop app. You can install multiple themes, plugins and customize them the way you want.
Also, Syncthing is open-source, free, and available for Windows, Linux, Android, and macOS devices (not for iOS though) so there shouldn’t be any problem.
And the best thing about Syncthing, it doesn’t require internet bandwidth to work. Your devices just have to be on the same wifi network.
I absolutely love the setup!
📢 Update – 31 August 2021
I have decided to subscribe to Obsidian Sync which is $5 per month (if billed monthly).
While Obsidian + Syncthing works great, I started to have some issues with it.
The issue is, both your devices need to be connected to the same wifi network otherwise the changes will not sync immediately. Plus, the Syncthing mobile app keeps always running in the background and drains the battery fast.
Also, if you make some changes in a note from one device and then again make some changes from the other device without letting Syncthing sync the first change, there will be conflicts in syncing. And, you will have to resolve it manually every single time.
For my use case, it wasn’t working efficiently and that’s why I decided to get Obsidian Sync.
However, if all your devices are always connected to the same network, you can keep using the Obsidian and Syncthing setup.
Also check: Why I chose Obsidian over Evernote, Standard Notes, Simple Note, and Logseq
💬 Discussion
Let’s discuss this on Twitter
Skip to content
This is a tutorial on how to use Foldersync to sync your desktop vault to the Android version of Obsidian.
Update History
- 12/26/2021: Added a workaround on fixing duplicated files under the Troubleshooting section.
Things Needed
- Obsidian Mobile
- Foldersync
- OneDrive
For this tutorial, I’ll be using the OneDrive cloud service to sync my vault to the mobile app.
Add the Vault to Onedrive
- Click and drag the vault to your OneDrive folder.
- Open OneDrive and wait for it to sync your vault.
Add OneDrive to Foldersync
- Install Foldersync on your Android device.
- Tap on the icon in the middle (Accounts) and tap Add account. Scroll down and select OneDrive from the list.
- Tap Authenticate Account and log-in your OneDrive account
- If the app does not take you back to the previous screen, copy the authentication text (it is the long series of texts and numbers). Manually go back to the previous screen and tap “Enter Oauth Code”. Paste the authentication text there.
Sync the Vault

- Tap on the Folder icon left of the Account icon at the bottom of the screen
- Tap Create folderPair and choose the OneDrive account.
- Select Two way for Sync Type and tap on the Folder next to Remote Folder and point the Obsidian folder from your Onedrive account.
- Tap the Folder next to the Local Folder and create a new folder called Obsidian in your phone directory.
- Scroll down under Sync options and make sure that Sync subfolders is enabled. Tap the Save button to confirm changes.
- Press the Sync button to sync the contents from your OneDrive folder to your phone’s Obsidian directory.
Troubleshooting
Sync Failure

This usually happens if there are conflicting files in your vault. Follow the steps below to fix this error.
- Open Foldersync and select the folder icon and tap on the OneDrive Vault.
- Scroll down and tap on the Advanced button. Under the “If both local and remote file are modified”, change the setting to Overwrite oldest.

Duplicated Files
Duplicated files usually happen when you perform the following actions:
- Changed the name of a note
- Deleted a note
- Moved a note to a different folder
To prevent duplicated files from appearing in your vault, I recommend performing these actions on your primary device (laptop or desktop).
If you have already synced your vault in your secondary device (mobile phone or tablet), delete it first and then sync it again so that the contents of the vault are the same as the primary device.
If you found this helpful, consider supporting me on Ko-fi!

Here I show you how I use an encrypted git repository on GitHub to sync my Zettelkasten to all my devices, including my Android smartphone.
In case you’re wondering: My digital Zettelkasten is a folder in my filesystem, containing plain text files with Markdown formatting (and images) that I manage with Obsidian and sometimes with Sublimeless_ZK. This future-proof format lends itself perfectly to being version controlled and distributed with git.
Update: If you implement this, please make sure you also follow along my post about merges and conflicts!
Front matter
You will get the most out of this article when you know git and the command line does not put you off. Setting up my workflow requires both. While I will walk you through all steps necessary to get to an encrypted, GitHub-hosted Zettelkasten, it can appear intimidating if you’re completely unfamiliar with the command line.
I primarily work on Linux (or ChromeOS + Linux Shell), but all software involved is available for Windows and macOS, too.
Motivation
I usually use 5 different machines on a regular basis:
- my Chromebook is my private laptop
- my Linux desktop at home with the big screen
- my work laptop under Linux
- occasionally my same work laptop, booted into Windows
- my mobile phone running Android
I want to be able to work on my notes on all machines.
The solution I came up with, involves the following software:
- git
Obsidian GitPlugin for Obsidian- git-crypt
- termux for Android
- termux:widget for Android
Why not use BoxCryptor / Cryptomator and DropBox?
I had used DropBox sync in the past, with Sublimeless_ZK, and that lead to all sorts of sync conflicts on the DropBox side of things, especially after having been offline for a while — and in general, the sync was rather slow and also intermixed with everything else in my DropBox that wanted syncing. Syncing my Zettelkasten on Windows was never instant, as DropBox had to catch up with too much. Also, that time I didn’t use any encryption.
The broken Boxcryptor
When searching for cloud encryption software, Boxcryptor is one of the first search results. From what I read, its Linux support seems to be second-class, only available via its “portable” version that seems to only allow access to files through its GUI, making it inaccessible for other software.
Google also returns that in the past, their “classic” version had supported Linux properly, something they seem to have given up on. These days, they seem to focus more on MS Teams than Linux.
What I also noticed is that Boxcryptor’s download page is broken; it returns:
{"error":{},"message":"Cannot read property 'structuredData' of undefined"}
The overall picture I get, is:
- paid software
- clear focus on Windows and Mac
- subpar Linux support
- decision to not longer support Linux as a first class citizen
- not realizing their download page is broken
So Boxcryptor disqualified itself.
Cryptomator
I instantly liked Cryptomator:
- it is free
- it is open source
- it supports Linux, Windows, Mac, Android, iOS
- independent security audits exist
So if I ever wanted to use cloud encryption software, it would be Cryptomator.
Why I don’t like cloud encryption software for my Zettelkasten
Cloud encryption software like Cryptomator provides you with a virtual drive or virtual folder that acts as the interface to transparently encrypt and decrypt your files residing in another folder, one that is synced with the cloud.
The cloud-sync is left to the cloud provider. So to use Dropbox, you have to install their software that creates yet another virtual folder that gets synced to the cloud.
I don’t like the idea of nesting virtual folders, and: I don’t like to need to have encryption software and cloud-sync software running in the background. Especially on my chromebook, where I start the virtual Linux machine on-demand by opening the terminal, I want this to be as lightweight as possible. Just for running a terminal, I don’t want to start unnecessary background software.
Instant synchronization, as handy as it might look, can be dangerous: If you delete a file (or large portions of it) by accident, this gets synced with the cloud instantly — your errors get propagated to all other devices instantly as well. By the time you realize you made a mistake, it might be too late. I don’t like that. To protect yourself against such errors, you have to use some sort of backup or version control solution on top of the sync that sits on top of the transparent encryption.
Three layers of magic software is where too many things can go wrong. While I wouldn’t mind syncing my Dropbox and using Cryptomator in general, I don’t want to set them up just — and especially — for my Zettelkasten.
For all my version control needs I use git anyway — so if I can encrypt my git repository transparently, that’s actually all I need.
Why I prefer git and GitHub
I quite like the synchronization workflow I get through git:
- I work on my local copy
- I can refresh the local copy to the state of the cloud repository (
git pull) - I can make changes locally
- I stage the changes that I want to keep and commit them locally (
git addandgit commit) - When I’m happy with it, I push the changes to the cloud repository (
git push)
With an Obsidian plugin, committing and pushing are just one hotkey press away, as is pulling. If I feel like it, however, I can use git’s command line tools or any other git software for syncing.
Syncing on demand is very useful. It protects me against accidently propagating mistakes to all synced devices. It gives me a chance to review my changes. And since git is built for distributed version control, detecting and resolving conflicts is something very natural to it.
Reverting back to previous versions, etc, is also possible with git. Since I use git extensively in my daily work, I really like the idea of using it to take care of my Zettelkasten, just as I trust it with all my source code.
Before deciding to taking my Zettelkasten (back to) the cloud, I had used git to sync between my devices:
- Chromebook
- Linux desktop
- Work laptop
- Android phone
However, I had used my Linux box for keeping the central repository that all working copies push to, with my local IP address. Obviously this only works in my home network, so syncing on the go is not possible.
Using GitHub (or GitLab) or any public, cloud-hosted git repository will provide me with an off-site backup in the cloud and will enable syncing at work and on the go.
So let’s dive in and get our vault under git control.
Git and git-crypt
(Re-) Initialize your Repo
In the following examples, your Obsidian vault will be located in ~/zettelkasten.
!!! PLEASE MAKE A COPY OF YOUR VAULT FIRST !!!
$ cp -pr zettelkasten zettelkasten.bak
This, zettelkasten.bak, will be our backup if anything goes wrong later.
We initialize a git repository, initialize git-crypt and copy the secret key it generates to ~/git-crypt-key:
$ cd zettelkasten

# delete existing git repo
# let's not expose cleartext history!
$ rm -fr .git/

$ git init
$ git-crypt init

$ git-crypt export-key ../git-crypt-key
Set up gitignore and .gitattributes
Here is my .gitignore, you may want to put the entire .obsidian directory into there, but I prefer it this way:
My .gitignore:
.obsidian/workspace
.obsidian/cache
Alternatively, just copy back the ignore file from your backup if you had used git before:
$ cp ../zettelkasten.bak/.gitignore .
git-crypt only encrypts files with certain git attributes. In my case, I specify:
- all
.mdmarkdown files in all subfolders - all files in all subfolders
- this wil exclude dotfiles like
.gitattributes
- this wil exclude dotfiles like
You need to store these attributes in a file called .gitattributes.
Here is my .gitattributes:
*.md filter=git-crypt diff=git-crypt
*/** filter=git-crypt diff=git-crypt
Now, if you’re using oh-mz-zsh, the following two commands will prevent it from slowing down your command line:
$ git config --add oh-my-zsh.hide-status 1
$ git config --add oh-my-zsh.hide-dirty 1
Add your files
TEST YOUR .gitattributes
$ git ls-files -z |xargs -0 git check-attr filter |grep unspecified
You should only see harmless files like .gitattributes be reported as unspecified. If any file pops up here that you want to be encrypted, you need to change your .gitattributes.
If unsure, use mine:
*.md filter=git-crypt diff=git-crypt
*/** filter=git-crypt diff=git-crypt
Commit and push
First, we’ll commit all files we have added before:
Set up remote repo for testing your config
In order to test the encryption when pushing, we’ll set up a bare git repository :
$ cd
$ mkdir bare
$ cd bare
$ git init --bare
We’ll temporarily add it as remote repo and push our zettelkasten there:
$ cd
$ cd zettelkasten
$ git remote add bare ../bare
$ git push bare master
Now we clone the bare repo to see whether we get back encrypted files:
$ cd
$ git clone bare testcrypt
$ cd testcrypt
$ cat some file
The file should come back as scrambled. Let’s try to unlock the repository:
$ git-crypt unlock ../git-crypt-key
$ cat some file
The file should be decrypted.
Note: From now on, you can add, commit, push from the testcrypt repository, and git-crypt will transparently encrypt and de-crypt your files.
Cleaning up local test repos
$ cd
$ rm -fr bare testcrypt

$ cd zettelkasten
$ git remote rm bare
Push to GitHub
Create an empty, private repository on GitHub and follow the instructions about how to push an existing repository.
I assume, you have used GitHub before and have your credentials set up (e.g. for ssh use):
$ cd
$ cd zettelkasten

$ GH_USER=your github user name
$ GH_REPO=your repository name

$ git remote add origin
      git@github.com:$GH_USER/$GH_REPO.git

$ git branch -M main   # ...
$ git push -u origin main
Great! Your encrypted zettelkasten is now on GitHub 😀!
Checking it out on a different machine
To work with your vault on a different machine
- install git-crypt
- clone the repository
- unlock the repository
For that to work, copy the git-crypt-key to the new machine; I use scp for that:
$ cd
$ scp git-crypt-key other_machine:
Now clone and unlock:
$ GH_USER= your github username
$ GH_REPO= your github repository name

$ git clone git@github.com:$GH_USER/$GH_REPO.git

$ cd $GH_REPO
$ git-crypt unlock ../git-crypt-key
Don’t forget, if you use oh-my-zsh, to do the following:
$ git config --add oh-my-zsh.hide-status 1
$ git config --add oh-my-zsh.hide-dirty 1
Note: From now on, you can add, commit, push from this repository, and git-crypt will transparently encrypt and de-crypt your files.
Obsidian
Install the plugin Obsidian Git.
Configure the plugin: Make sure, Disable push is deactivated.
Do this on all your machines.
Now, every time you want to sync your changes, press ctrl+p and search for “Obsidian Git : commit …”.
The plugin will automatically pull all remote changes when you start Obsidian. If you leave it running for days, you might want to pull recent changes manually: ctrl+p and search for “Obsidian Git: Pull”.
Update: If you implement this, please make sure you also follow along my post about merges and conflicts!
Android
Now on to the most hacky part of them all: syncing your repository on Android!
Once you have your Zettelkasten on your mobile, you can access it, add and edit files with software like iA / Writer or Epsilon Notes.
We will install the fantastic termux to get a Linux shell on Android. Then we will install git and git-crypt, and clone the repository like we would on Linux.
We’ll add a handy commit and push and a pull shortcut that we can launch directly from the homescreen.
Installing termux
First, we install termux. The play store version works fine, eventhough they recommend F-Droid. Later, we’ll install an add-on that adds scripts for pulling and pushing to our homescreen. This add-on is free on F-Droid but costs ca EUR 2.00 on the play store. Since one shouldn’t mix play store and F-Droid and I had termux installed already, I just kept continuing using the playstore version.
The following commands, typed within termux, will install git and git-crypt, and also give termux access to your phone’s files.
within termux :
$ pkg install git git-crypt

# make storage available
$ termux-setup-storage

# this will give you the storage directory
Now we’ll prepare for GitHub access.
GitHub
First, we generate a new ssh key for Android.
In termux, we type:
$ ssh-keygen -t ed25519 -C "your_email@example.com"
When prompted for a passphrase, we just press enter.
Next, we add the ssh key to GitHub: like described here:
- we sign in to Github
- we click our photo
- we select settings
- we click on “SSH and GPG keys”
- we click on “New SSH key”
- we go to termux and type
cat .ssh/id_ed25519.pub - we copy the key
- we paste it into the “key” field of the browser
- we click “Add SSH key”
git-crypt
We need to copy the git-crypt-key file into termux. I zipped it, uploaded it to a safe space, and used Chrome on Android to download it. So my downloads folder contained git-crypt-key.zip. So in termux, I typed:
$ cd
$ unzip storage/downloads/git-crypt-key.zip
$ chmod 600 git-crypt-key
Next, we clone the repository:
$ GH_USER= your github username
$ GH_REPO= your github repository, e.g. zettelkasten
$ git clone git@github.com:$GH_USER/$GH_REPO.git
Now we unlock it using git-crypt:
$ cd $GH_REPO
$ git-crypt unlock ../git-crypt-key
Once it’s finished, we move it to the shared folder:
$ cd
$ mv $GH_REPO storage/shared/
Great, now you can access your notes from any Android app!
Shortcuts for committing, pushing, and pulling
We’ll create a few scripts:
repo.conf:
pull.sh:
source $HOME/repo.conf
cd $HOME/storage/shared/$GH_REPO
git pull
cd $HOME
bash -c "read -t 3 -n 1"
push.sh:
source $HOME/repo.conf
cd $HOME/storage/shared/$GH_REPO
git add .
git commit -m "android on $(date)"
git push
cd $HOME
bash -c "read -t 3 -n 1"
log.sh:
source $HOME/repo.conf
cd $HOME/storage/shared/$GH_REPO
git log
cd $HOME
bash -c "read -t 5 -n 1"
You can prepare and download them, just like we did with git-crypt-key or edit them directly in termux.
Next, we’ll make them executable:
$ cd
$ chmod +x pull.sh push.sh log.sh
From now on, we can commit and push like this:
And we can pull remote changes like this:
We can see what version we’re on with:
However, it will be even cooler, when we can push and pull directly from the homescreen of our phone.
Adding shortcuts to the homescreen
First, we need to install termux: widget from the play store or F-Droid, just like we did with termux itself.
Next, we create the shortcuts in termux:
$ cd
$ mkdir .shortcuts
$ cd shortcuts
$ ln -s ../push.sh
$ ln -s ../pull.sh
$ ln -s ../log.sh
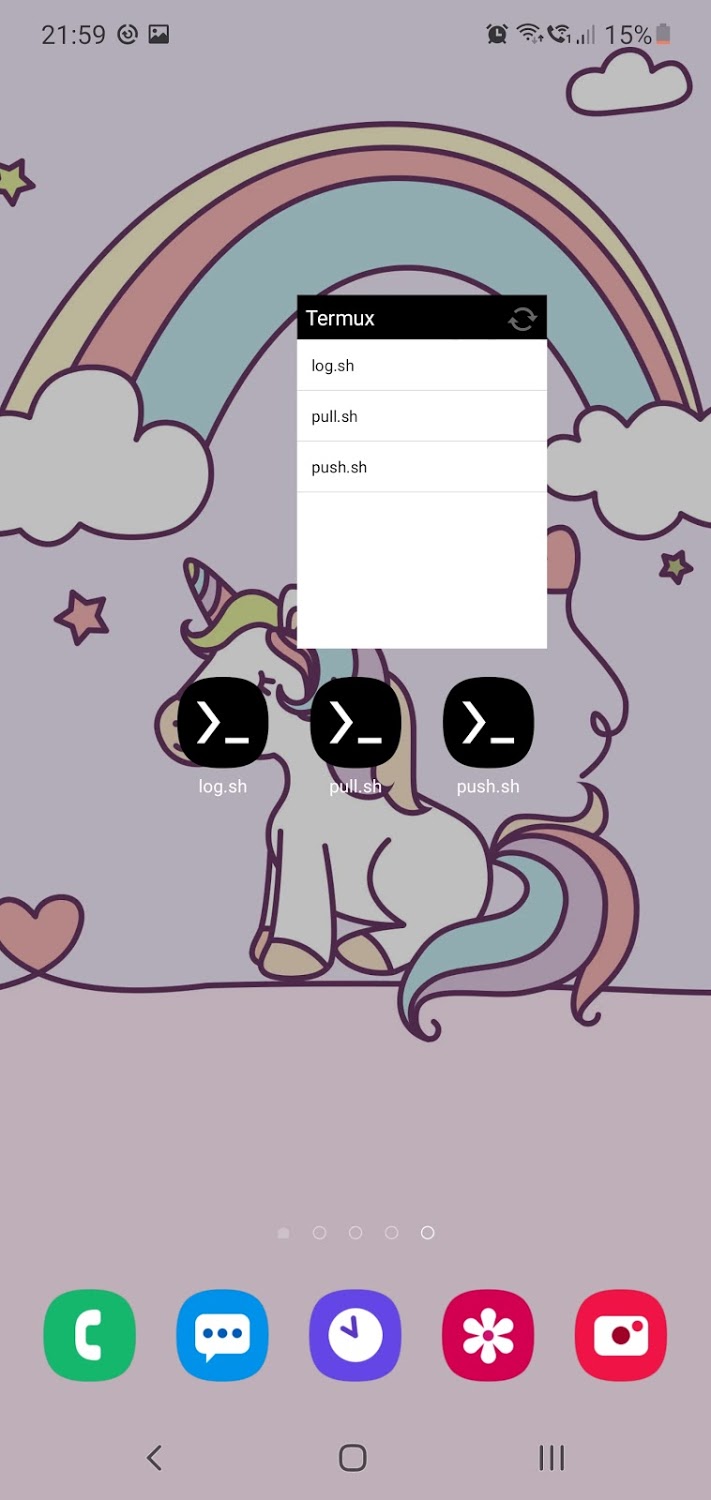
After that, after exitting termux, you can open your launcher’s widget menu, select Termux:Widget and place it on your home screen.
Note: The shortcuts will only work when termux is not running. To exit, type exit and press [enter]!
There are two different variants:
- one shows a little text menu
- the other one allows you to place an icon per script
And here is my output of log.sh on Android:
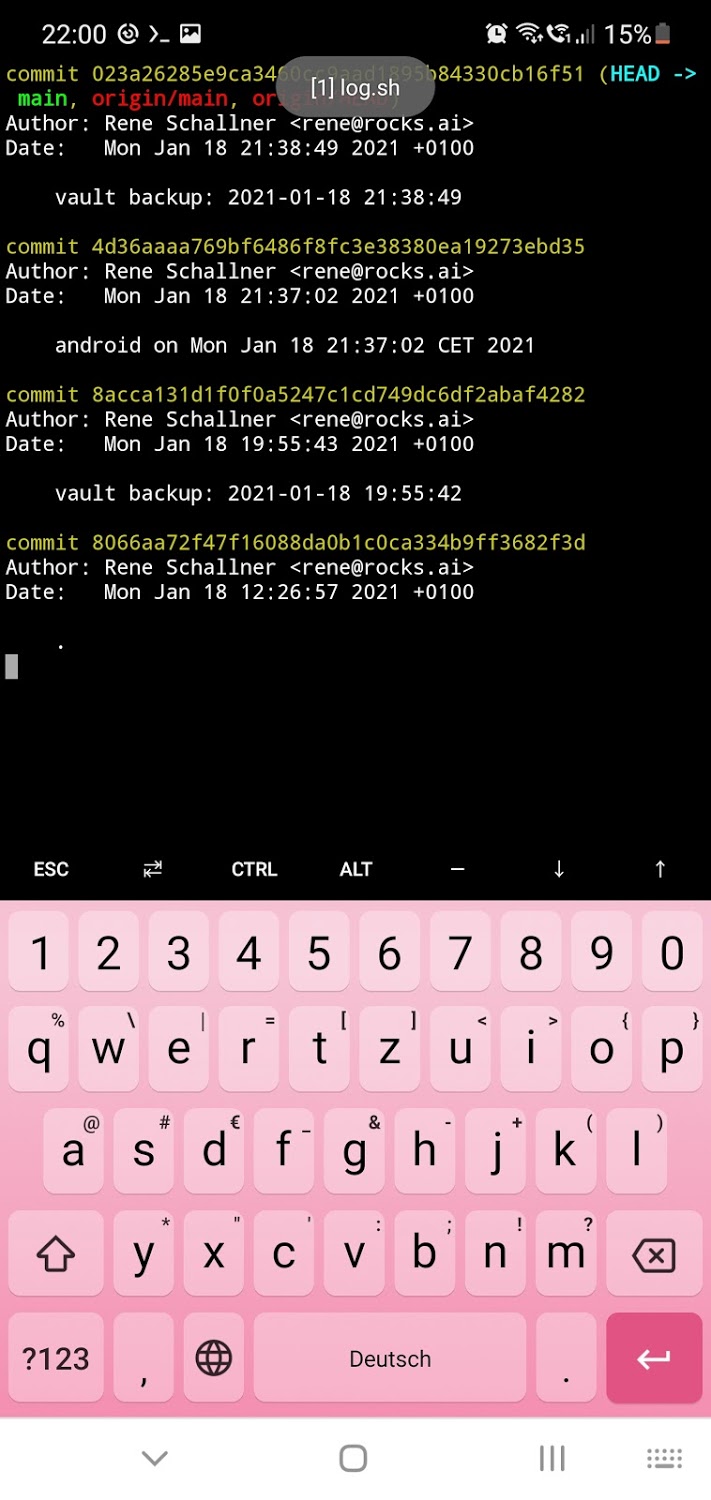
Et voila! Now you have an encrypted GitHub repository for your Zettelkasten that you can use to sync all your devices!
Update: If you implement this, please make sure you also follow along my post about merges and conflicts!
Research
Here are a few notes I took while researching different options:
- git-crypt
- only encrypts single files, GPG based, supports symmetric keys
- gitattributes to define what files to encrypt / decrypt
- can be tricky if you want all files to be encrypted
- need to avoid .gitattributes etc
- can be tricky if you want all files to be encrypted
- cannot re-encrypt once keys are revoked, etc
- for entire repos, they recommend git-remote-gcrypt
- git-remote-gcrypt
-
Using an arbitrary
<giturl>or ansftp://URI requires uploading the entire repository history with each push. -
every git push effectively has –force. Be sure to pull before pushing.
-
git-remote-gcrypt can decide to repack the remote without warning, which means that your push can suddenly take significantly longer than you were expecting, as your whole history has to be reuploaded. This push might fail over a poor link.
-
- git-secret
- needs to .gitignore your real files
- creates .secret files — doubling the number of files
- needs git-secret reveal
- shitty workflow
- transcrypt
- looks OK
- uses .gitattributes, too
- this gist looks promising
- but what about: android
- possible solution: termux
- but what about: android
- termux
- 4 secrets management tools for Git encryption
- Things You Must Know About git-crypt To Successfully Protect Your Secret Data