В магазине одежды и аксессуаров для аватара в Роблоксе огромное количество разных вещей. Большинству игроков, которые хотят сделать своего уникального персонажа, этих предметов хватает. Однако некоторая часть пользователей хочет создавать свои вещи.
Создание своих вещей имеет несколько плюсов. Во-первых, можно воплотить практически любой желаемый итем в Роблоксе. Во-вторых, если выложить хорошую вещь, которая понравится игрокам, можно заработать робуксов и даже перевести их в реальные деньги.
Зайдя в магазин, можно заметить, что много разных предметов создано игроками. Под названием вещи указан ник игрока или группы, которая его выпустила.
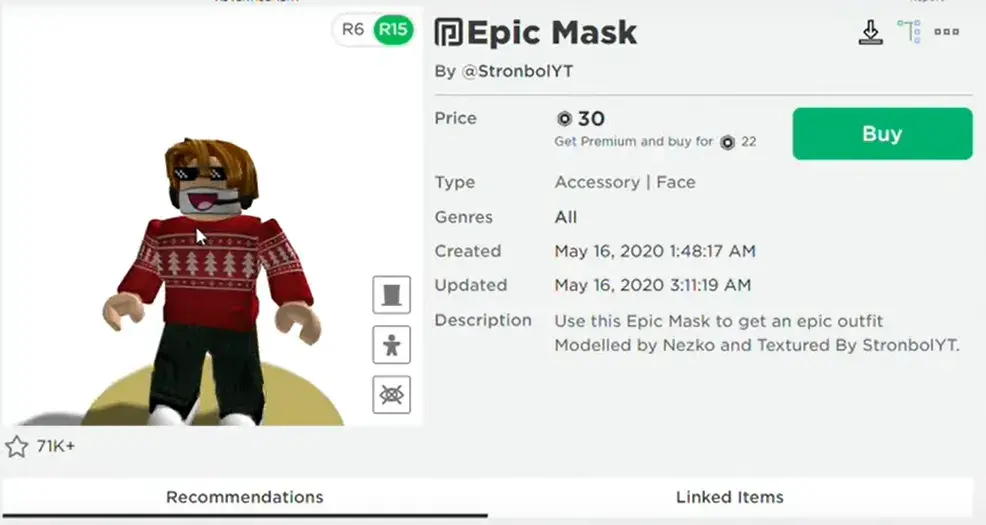
Создание футболки и штанов
Для начала рекомендуется скачать специальную картинку и установить любой удобный фоторедактор. Две картинки — это шаблоны. Можно найти шаблон как для футболок, так и для штанов.
На установленном черновике имеется разметка для торса и двух рук (на шаблоне для штанов — для двух ног). Цветные детали нужно заменить на текстуры. Их можно найти в интернете, однако лучший способ — создать самостоятельно.
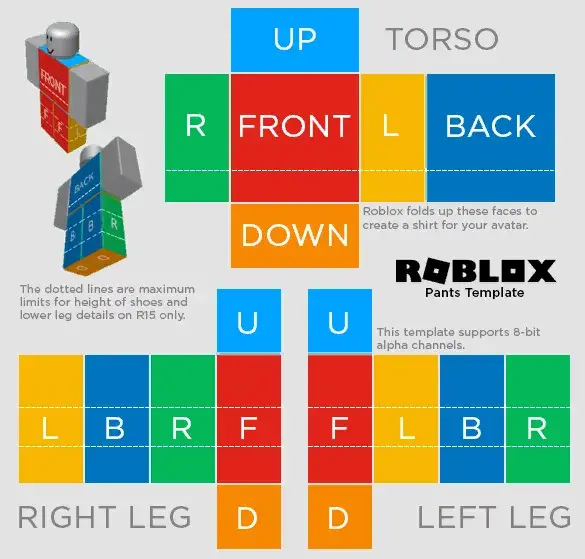
Фоторедактор нужен для переноса текстур на шаблон. Когда текстура будет полностью перенесена на цветные элементы эскиза, можно загружать предмет.
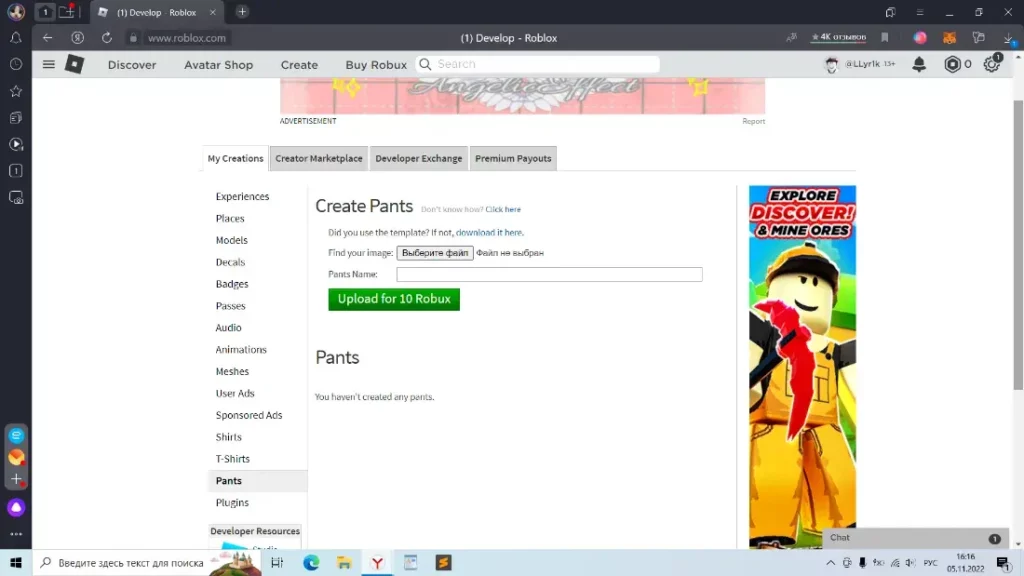
- Чтобы опубликовать созданную вещь, нужно перейти в раздел Create из главной страницы Роблокса.
- Перейти в Shirt для того, чтобы сделать футболки, или Pants, для создания штанов.
Предмет можно опубликовать всего за 10 робуксов. Именно во вкладке разработчика можно создавать новые вещи. Нужно загрузить сделанный шаблон, придумать название предмета, указать описание, ввести цену и т.п.
Создание 3D-предметов
С другими вещами все довольно просто — достаточно наложить на картинку свои текстуры и можно загружать новую модель.
Для создания 3D шляп, эффектов, питомцев и других аксессуаров придется получить бейдж клуба Строителей. Дается он не всем игрокам. Чтобы его получить, нужно разработать плейс, на который зайдет определенное количество человек. Игроки с бейджем клуба Строителей получают доступ к следующему меню:
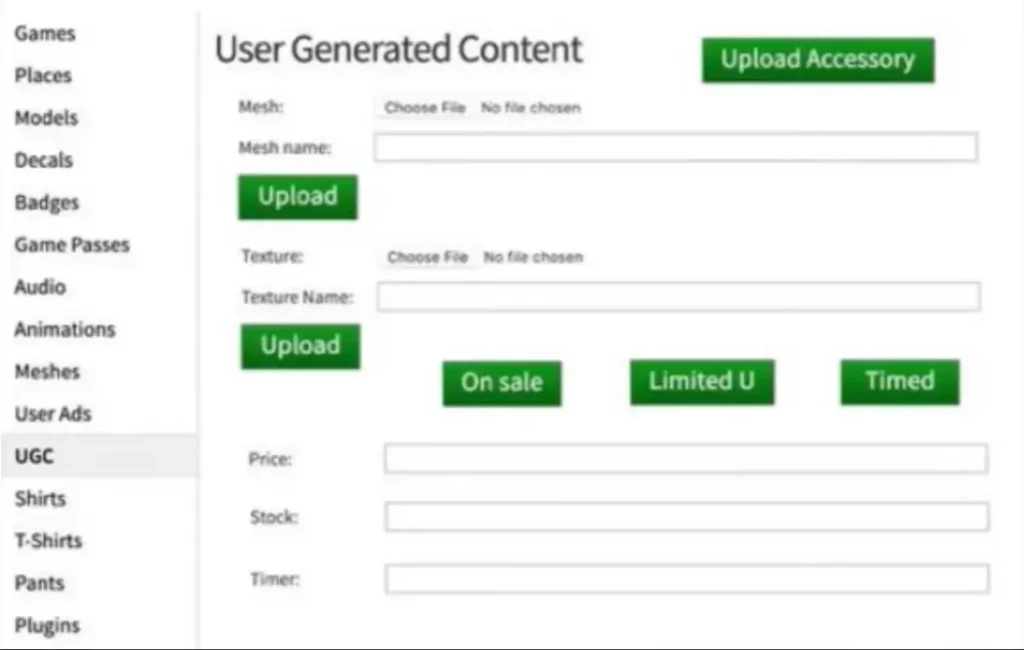
Найти данное меню можно слева, перейдя во вкладку Create из главной страницы Роблокса.
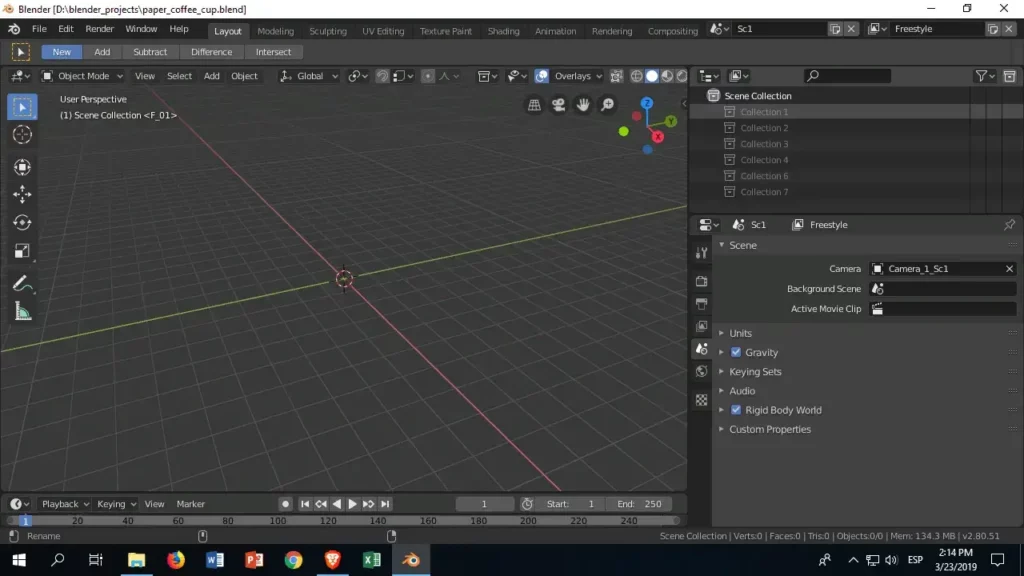
Чтобы загрузить свой предмет, нужно сначала сделать 3D-модель и текстуру для него. Сделать это можно в программе Blender. Она бесплатная для всех пользователей. Интерфейс в этом программном обеспечении может быть сложным для новичков.
Далее в специальном меню нужно выбрать название предмета, загрузить 3D-модель и текстуры, указать цену и т.п. Заполнив информацию о предмете, можно загружать его в магазин.
Создание другого лица
К сожалению, все существующие в Роблоксе лица созданы непосредственно разработчиками Роблокса. Разработать вид и выставить свое лицо не получится, однако можно заменить файлы игры и играть с желаемым лицом. Есть лишь один минус — другие игроки его видеть не будут.
- Для начала нужно найти в интернете желаемую картинку, которая станет новым лицом персонажа.
- Когда подходящий вариант найден, необходимо скачать картинку.
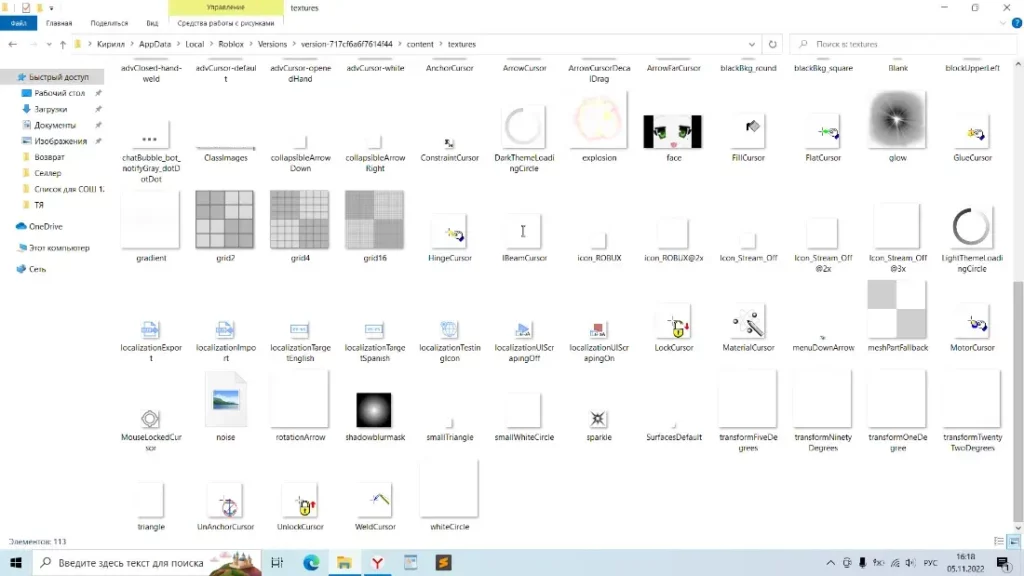
- Нажав правой кнопкой мыши по иконке Роблокса, надо перейти в расположение файла. В открывшейся папке перейти в content, далее в textures.
- В папке с текстурами нужно найти face и переместить в любое удобное место на рабочем столе, чтобы можно было вернуть все в прежнее состояние. Установленную ранее картинку следует назвать face и переместить в textures.
Работать способ может не со всеми картинками. Рекомендуется обрезать изображение до размеров исходного лица из textures, а также выбрать файл в формате png.
Download Article
Download Article
On Roblox, creating clothing is an easy way to show off your creativity, learn to use digital painting programs, and earn some Robux. If you’re lucky, your clothing may get popular within the catalog and you may make thousands of Robux. However, making clothing can be confusing at first, especially if you don’t know how the shirt/pants template works or how to upload clothing. This wikiHow article will teach you how to make and upload your own clothing.
-

1
Find an image or make one to use for the t-shirt. This will only be shown in front of the torso, so there is no restriction.
- Find an image online or make your own image.
- Do not use images that contain copyrighted material, this will likely result in your t-shirt and account being moderated.
- Make sure your image complies with the Roblox Community Rules
-

2
Upload your image. Log into the ROBLOX website, and in the top left, click on «Create».
- In the sidebar under ‘My Creations», click T-Shirts. Shirts are different, so make sure you don’t mix up the terms.
- Click on «choose file». Select the image you have saved from earlier.
- Name your t-shirt. Avoid using misleading names if you’re planning to sell it, as your design may not show up in the catalog.
- Click upload. Enjoy your new t-shirt! If you have a Premium subscription, you may sell it in the catalog. You can still wear your own t-shirt without premium.
Advertisement
-

1
Download the shirt or pants template [1]. This is the only way to design a usable outfit.
-

2
Open up the file in a paint tool. This is where you can create your shirt design
- Make sure the design fits into the template. Anything outside of the boxes in the template will not show up once the clothing is uploaded.
Advertisement
-
1
- If you’re designing on a PC, popular paint tools utilized by clothing designers include GIMP, Paint.NET, Pixlr (website only), and Krita.
- If you’re designing on a phone or tablet, popular paint tools utilized by clothing designers include ibisPaint X and Procreate (iOS only).
- If there is an option to add layers, use that opportunity to create a color guide. This will help you to put the right texture or design into the right box.
-

2
Begin coloring in the boxes. Avoid coloring outside the lines — use a selection tool or bucket for that.
- Remember, Roblox folds up the net of patterns so it is essential that you arrange the designs in the correct position.
- Make your design look both great and unique. You can find inspiration on sites such as Pinterest if you need it. Some drawing apps have a materials library with clothing patterns and textures you can use.
- You can copy, paste and resize images into the boxes. Be accurate and careful.
- Do not spend little time on the design, as the result may either look ridiculous or not work.
- Save your design before exiting!
- Make sure your design is 585 pixels by 559 pixels. Any larger or smaller, even if the image has the same aspect ratio, and your template will not upload.
- Do not use images that contain copyrighted material, this will likely result in your clothing and account being moderated.
- Make sure your design complies with the Roblox Community Rules
-

3
Upload your design. Enter the ROBLOX website. Ensure that you have logged in.
- In the top left, click on «Create».
- In the sidebar under ‘My Creations», click «Shirts» or «Pants». T-Shirts are different and do not need a template, just an image. See the t-shirt method for that.
- Click on «choose file». Select the template you have saved and edited.
- Name your design. Avoid using misleading names as your design may not show up in the catalog.
- Uploading pants and shirt designs cost 10 Robux to prevent spam on the catalog.
- Click «Upload for 10 Robux». If you would like to upload the design to your group instead, click «Group Creations» instead of «My Creations». Enjoy your new Roblox shirt or pants! If you would like to sell your shirt or pants, you need to have Premium. You can set any price you’d like, the minimum being 5 Robux.
Advertisement
Add New Question
-
Question
What painting download do I use for Mac?

For Mac, I use the app Paint 2 that I got from the app store, and it’s pretty simple and perfect for Roblox clothing making.
-
Question
How do I develop clothing in Roblox if I can’t find the develop button?

If you are on a computer, click the tab called «Create,» then click the option of your choice, shirt, pants, t-shirt, etc. Roblox changed it from «Develop» to «Create.»
-
Question
How can I make a shirt or pants without a membership and having to buy it?

You can try getting a designer with a membership to upload them on your behalf and offer to share the profits.
See more answers
Ask a Question
200 characters left
Include your email address to get a message when this question is answered.
Submit
Advertisement
-
Spend time on your designs.
-
Use a transparent background if you want to make things like hair extensions or neck holes.
-
Use other designs for inspiration, but don’t copy other user’s designs.
Thanks for submitting a tip for review!
Advertisement
About This Article
Article SummaryX
While you need to be a ROBLOX member to design most clothing, non-members can still design t-shirts. You’ll need to be logged into your account to do this. To make a t-shirt, choose or design an image to go on the front of the shirt. Then, click on the “Develop” tab on the top of the screen to upload your image. Make sure to choose an accurate title for your t-shirt so viewers who see it in the catalog know what it is. To learn how to make shirts and pants on ROBLOX, read on!
Did this summary help you?
Thanks to all authors for creating a page that has been read 136,256 times.
Did this article help you?
Download Article
Download Article
On Roblox, creating clothing is an easy way to show off your creativity, learn to use digital painting programs, and earn some Robux. If you’re lucky, your clothing may get popular within the catalog and you may make thousands of Robux. However, making clothing can be confusing at first, especially if you don’t know how the shirt/pants template works or how to upload clothing. This wikiHow article will teach you how to make and upload your own clothing.
-

1
Find an image or make one to use for the t-shirt. This will only be shown in front of the torso, so there is no restriction.
- Find an image online or make your own image.
- Do not use images that contain copyrighted material, this will likely result in your t-shirt and account being moderated.
- Make sure your image complies with the Roblox Community Rules
-

2
Upload your image. Log into the ROBLOX website, and in the top left, click on «Create».
- In the sidebar under ‘My Creations», click T-Shirts. Shirts are different, so make sure you don’t mix up the terms.
- Click on «choose file». Select the image you have saved from earlier.
- Name your t-shirt. Avoid using misleading names if you’re planning to sell it, as your design may not show up in the catalog.
- Click upload. Enjoy your new t-shirt! If you have a Premium subscription, you may sell it in the catalog. You can still wear your own t-shirt without premium.
Advertisement
-

1
Download the shirt or pants template [1]. This is the only way to design a usable outfit.
-

2
Open up the file in a paint tool. This is where you can create your shirt design
- Make sure the design fits into the template. Anything outside of the boxes in the template will not show up once the clothing is uploaded.
Advertisement
-
1
- If you’re designing on a PC, popular paint tools utilized by clothing designers include GIMP, Paint.NET, Pixlr (website only), and Krita.
- If you’re designing on a phone or tablet, popular paint tools utilized by clothing designers include ibisPaint X and Procreate (iOS only).
- If there is an option to add layers, use that opportunity to create a color guide. This will help you to put the right texture or design into the right box.
-

2
Begin coloring in the boxes. Avoid coloring outside the lines — use a selection tool or bucket for that.
- Remember, Roblox folds up the net of patterns so it is essential that you arrange the designs in the correct position.
- Make your design look both great and unique. You can find inspiration on sites such as Pinterest if you need it. Some drawing apps have a materials library with clothing patterns and textures you can use.
- You can copy, paste and resize images into the boxes. Be accurate and careful.
- Do not spend little time on the design, as the result may either look ridiculous or not work.
- Save your design before exiting!
- Make sure your design is 585 pixels by 559 pixels. Any larger or smaller, even if the image has the same aspect ratio, and your template will not upload.
- Do not use images that contain copyrighted material, this will likely result in your clothing and account being moderated.
- Make sure your design complies with the Roblox Community Rules
-

3
Upload your design. Enter the ROBLOX website. Ensure that you have logged in.
- In the top left, click on «Create».
- In the sidebar under ‘My Creations», click «Shirts» or «Pants». T-Shirts are different and do not need a template, just an image. See the t-shirt method for that.
- Click on «choose file». Select the template you have saved and edited.
- Name your design. Avoid using misleading names as your design may not show up in the catalog.
- Uploading pants and shirt designs cost 10 Robux to prevent spam on the catalog.
- Click «Upload for 10 Robux». If you would like to upload the design to your group instead, click «Group Creations» instead of «My Creations». Enjoy your new Roblox shirt or pants! If you would like to sell your shirt or pants, you need to have Premium. You can set any price you’d like, the minimum being 5 Robux.
Advertisement
Add New Question
-
Question
What painting download do I use for Mac?

For Mac, I use the app Paint 2 that I got from the app store, and it’s pretty simple and perfect for Roblox clothing making.
-
Question
How do I develop clothing in Roblox if I can’t find the develop button?

If you are on a computer, click the tab called «Create,» then click the option of your choice, shirt, pants, t-shirt, etc. Roblox changed it from «Develop» to «Create.»
-
Question
How can I make a shirt or pants without a membership and having to buy it?

You can try getting a designer with a membership to upload them on your behalf and offer to share the profits.
See more answers
Ask a Question
200 characters left
Include your email address to get a message when this question is answered.
Submit
Advertisement
-
Spend time on your designs.
-
Use a transparent background if you want to make things like hair extensions or neck holes.
-
Use other designs for inspiration, but don’t copy other user’s designs.
Thanks for submitting a tip for review!
Advertisement
About This Article
Article SummaryX
While you need to be a ROBLOX member to design most clothing, non-members can still design t-shirts. You’ll need to be logged into your account to do this. To make a t-shirt, choose or design an image to go on the front of the shirt. Then, click on the “Develop” tab on the top of the screen to upload your image. Make sure to choose an accurate title for your t-shirt so viewers who see it in the catalog know what it is. To learn how to make shirts and pants on ROBLOX, read on!
Did this summary help you?
Thanks to all authors for creating a page that has been read 136,256 times.
Did this article help you?
Многопользовательская платформа Roblox позволяет создавать собственные игры и предметы для их наполнения. Пользователи, купившие подписку Premium, могут продавать виртуальные вещи за внутреннюю валюту Robux. Однако покупать любые предметы, а также сделать свою собственную одежду в игре Роблокс, имеет право каждый игрок.
Содержание
- Где найти нужный раздел в Роблокс для создания одежды
- Что делать дальше, чтобы создать свою одежду в Роблоксе::
- Как сделать свою футболку в Roblox
- Как добавить свою футболку или «T-Shirts» в Роблоксе:
- Создание рубашки и брюк в Роблоксе
- Альтернативный вариант:
- Чтобы скачать шаблон самому с официального сайта Roblox для создания своей одежды, нужно:
- Как делать брюки или рубашку в графическом редакторе для Роблокса:
Где найти нужный раздел в Роблокс для создания одежды
Зайдите на сайт roblox.com. Затем авторизуйтесь со своего аккаунта или зарегистрируйтесь.
Если нужно перевести ресурс на русский язык, можно:
- добавить и включить специальное расширение;
- изменить настройки;
- щелкнуть правой клавишей мыши по веб-странице и в открывшемся меню выбрать пункт «Перевести».
Что делать дальше, чтобы создать свою одежду в Роблоксе::
- В шапке страницы располагается панель управления. Она выделена синим цветом. Найдите клавишу «Создайте» или «Create», а затем кликните по ней.
- Откроется новая страница с рекламой сервиса. В нижней части верхнего блока будет находиться крупная зеленая кнопка «Начать создание». Под ней вы увидите строчку «Управление моим играми», или «Manage my creations». Нажмите на нее.
- После этого откроется личный кабинет пользователя. Под названием раздела «Мои творения», или «My Creations», вы найдете список всего, что можно сделать с помощью сервиса Roblox. В конце перечня расположены такие пункты как «Рубашки», «Футболки», «Брюки». На английском будет написано: «Shirts», «T-Shirts», «Pants». Щелкните курсором по любому из этих пунктов.

Выбор одежды в Роблоксе
Раньше делать брюки и рубашки могли только члены «Клуба строителей». Сейчас его заменила Premium-подписка. Ее необходимо покупать за реальные деньги.
Читайте также: Коды на песни в Роблокс.
Как сделать свою футболку в Roblox
Проще всего создавать футболки. Это небольшие изображения, которые будут размещены спереди, на торсе игровой фигурки. Желательно, чтобы они имели размер 128×128px. Вы можете нарисовать собственную картинку или сохранить на своем компьютере рандомное изображение с черным фоном из интернета, а затем видоизменить его в любом графическом редакторе. Если одежда не будет иметь равную длину и ширину, то она не покроет полностью торс персонажа.

Как добавить свою футболку или «T-Shirts» в Роблоксе:
- Нажмите на клавишу «Обзор»;
- Найдите нужный файл в памяти своего устройства и щелкните по кнопке «Открыть»;
- Если считаете нужным, подпишите новый скин в отведенном под название поле «Name»;
- Кликните по большой зеленой кнопке «Upload», которая находится чуть ниже строки для ввода наименования вашей одежды.
Чтобы проверить результат, кликните на название скина. Если оно не вводилось, одежда будет подписана комбинацией цифр, выделенной темно-синим цветом. После нажатия на имя футболки, сервис перебросит вас на следующую страницу.
По изображению станет видно, насколько картинка покрывает «рабочую» область одежды. В правой нижней части окошка с футболкой находится кнопка «Try On». Нажмите на нее, и вы увидите, как смотрится новый элемент гардероба на фигурке персонажа. Как видите, сделать свою одежду в игре Роблокс довольно просто!
https://youtu.be/mwYEfqsw1Co
Это может быть полезным: Коды на одежду в Роблокс 2020.
Создание рубашки и брюк в Роблоксе
Чтобы создать скин другого типа, понадобится купить подписку и скачать шаблоны. Если у вас уже есть Премиум, то просто переходите в разделе «My Creations» на вкладки «Shirts» или «Pants». Если же его нет, то придется приобрести, чтобы сделать свою одежду.
Для этого:
- Найдите в правой верхней части экрана значок в виде двойного шестигранника с помещенным внутрь квадратом и нажмите на него;
- В открывшемся окошке выберите опцию Buy Robux;
- Когда прогрузится следующая страница, кликните на крупную зеленую кнопку для покупки наиболее подходящего тарифа;
- Выберите тип платежа и перейдите на следующую страницу;
- Введите данные от своей карты или электронного кошелька, а затем подтвердите транзакцию.

Добавление одежды в Роблоксе
Альтернативный вариант:
- Щелкнуть по значку с тремя горизонтальными линиями;
- Внизу всплывающего меню найти серую кнопку «Get Premium»;
- Кликнуть по ней.

Преимум-аккаунт
Чтобы скачать шаблон самому с официального сайта Roblox для создания своей одежды, нужно:
- Зайти на страничку «Pants» или «Shirts»;
- Кликнуть по ссылке, которая подписана синими словами «download it here»;
- На открывшейся вкладке с шаблоном щелкнуть по картинке правой клавишей мышки;
- Выбрать из всплывшего списка строчку «Сохранить изображение как».
Все элементы шаблона подписаны:
| Обозначения: | Перевод: |
|---|---|
| «Front» | Перед. |
| «Back» | Зад. |
| «Up» | Верх. |
| «Down» | Низ. |
| «R» | Правая сторона одежды. |
| «L» | Левая сторона одежды. |

Как делать брюки или рубашку в графическом редакторе для Роблокса:
- Откройте Paint, Photoshop, GIMP или другую программу, которой вам будет удобно пользоваться.
- Установите размер изображения 585 пикселей по ширине и 559 px в длину. Подгрузите шаблон.
- Выделите его часть и аккуратно закрасьте ее нужным цветом. Повторите эту операцию на всех остальных элементах будущей одежды.
- Загрузите картинку, которую хотите добавить на рубашку или брюки. Вставьте ее в нужное место на шаблоне.
- Если нужно, дорисуйте элементы одежды самостоятельно при помощи встроенных инструментов выбранного редактора.
- Сохраните результат.
В интернете лежит немало уже обработанных шаблонов для Roblox, загруженных другими пользователями. Чтобы их найти, используйте поиск по ключу «Скины Роблокс», или попробуйте другие комбинации похожих по смыслу слов. Таким образом, мы разобрали способы, которые помогут сделать свою собственную одежду для персонажа в Роблокс.
